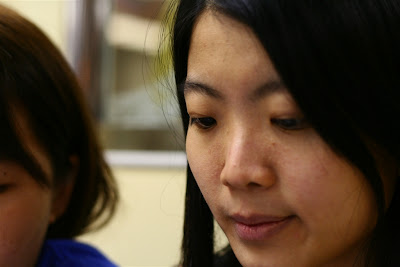
Nee Sern is...
Monday, March 30, 2009
Thursday, May 29, 2008
More of the Lambency
Here's how the diffused flash light from the Lambency looks like in the various possible configurations.
First, a direct flash with dome attached. The light source is bright, but of course the full blast of direct light is reflected by the mirror, causing much flare and thus reducing contrast. This configuration would be useful where there are no ceilings or walls to bounce from. 
Incidentally, this sort of light source reminds me of the home made flash diffuser I made last time.
OK, up next is the bounce with dome configuration. This configuration still gives a good forward light source, but it's not exactly all directed to the front, as the dome spreads out the light in all directions. As a consequence, the bounced light to the ceiling is probably not as bright compared to the light coming from the without dome configuration. Nonetheless, this could be useful it the ceiling or wall is too near to me, and having a direct bounce will result in harsh light.
Finally, this is the configuration for bounce without dome. The forward light source looks less bright compared to the with dome configuration. This will be useful if the ceiling or wall is a considerable distance away, and the bouncing of the flash light will create a large light source without resorting to the usage of the dome. This also saves considerable battery power and can be considered the general purpose use of the Lambency.
I'll be trying out the contraption in the coming days in the 29idc.
Saturday, May 24, 2008
Lagi barang mainan baru...
It's been a long time since I got myself some new photography toys. So I logged on to Yamiya eStore and bought myself a Lambency Flash Diffuser! I placed the order yesterday evening, and the package arrived today. Quite good and prompt service! So now I can use this in place of my flimsy and unprofessional homemade flash diffuser.
And here are some sample shots:
I hope I'll have more opportunities to test this gadget out. It's been a long time since I held a camera in my hands!
Tuesday, March 18, 2008
On the way to work
Wednesday, February 20, 2008
Experience as wedding photographer...
Thank you to Sie Sing for inviting myself and elsf to Kuching to help photograph her sister's "wedding". Why "wedding" is in inverted commas? Well, it was not really a full wedding ceremony. There was a simplified tea ceremony in the morning, followed by a simplified celebration dinner in the evening.
I borrowed jyon's 400D for the weekend (thanks jyon!) and attached the 50mm f1.8 lens there for portraits and low light natural pics. On my own 350D, I attached the 18-55 kit lens and the 430EX with home made diffuser for portable lighting capabilities and general shooting. My Panasonic rechargeables can be thrown away already. The recycling time is just too slow and the batteries seem to run out of juice too soon.
Well, shooting an event all by yourself is really difficult. With everything happening so fast and sequentially with no repeats, it is difficult to capture everything properly. Some of my pics turned out blur (motion blur) and out of focus (mostly with the 50mm). Fortunately, the group photos, family photos and couple photos turned out OK. I will be passing the DVD of photos to Sie Sing tonight.
Grappling with 2 cameras is not easy. I slung my 350D around my neck, and the 400D was over my right shoulder. With this configuration, I kept pressing the buttons on the 400D against the side of my body, so the white balance and auto focus kept on changing! Fortunately, it did not really affect the shooting process.
During the morning, things were less hectic as there were less people to contend with. And everything happened in a systematic fashion; relatives took their turns to drink tea and present ang pow. But no thanks to my slow-recharging Panasonic batteries, the flash did not recharge on time for some of the shots. Moreover, the 400D was screwing around with the exposure, either locking it too high or too low (I must have ter-pressed some buttons!). But after reviewing the shots, I thought I did manage to capture everybody.
But in the evening, I did not really go around the place (9 tables of the restaurant floor) to snap photos of the guests. My attention was focused mainly on the main table and the stage. I wanted to snap more of the couple and the parents as the photos will be for them and not for the guests. Well, thanks to Canon's orange colour cast, most photos without flash turned out orangey, while those with flash were well balanced. Overall, I think I scored 30% in this shoot, which is not bad for a first-timer I guess.
I hope to have more experience shooting events like this, but clearly having just one photographer is not sufficient to cover every aspect! Even if armed with 2 cameras, I'm just limited to one angle at any particular time. Having an extra photographer covering another angle will be more convenient and less stressful!
Sunday, September 16, 2007
Bicycles by the Beach
This was taken in Nusa Dua beach, Bali. I spotted these colourful children's bicycles parked by the beach in perfect alignment. They seemed to be speaking to each other while their owners played in the water.
Saturday, September 15, 2007
KL International Tattoo 2007
We were fortunate enough to get VIP Grandstand tickets to the KL International Tattoo 2007 last Saturday. Thanks to Datuk for providing the tickets!
We decided to car pool with MJ to Stadium Merdeka. I decided against bringing my DSLR and settled for the compact and very capable IXUS 850IS.
From Stadium Merdeka, I caught a view of the Twin Towers that I normally wouldn't get.
We were treated to a Colours of Malaysia show before the event actually started. We were waiting for the Agong, you see. And what an arrival! With the official announcements, the standing in attention, and the patriotic strains of Negaraku played by the ensemble bands!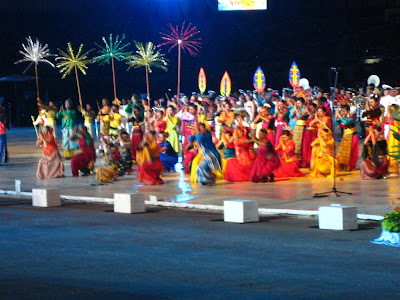
Initially had no idea what the Tattoo show was all about. Only knew that it was something to do with the military. Turned out to be all about military. Each invited country's military bands performed outstanding tunes and marching formations to the delight of the crowd! Just take a look at the UK team with their kilts and bagpipes.
A total of 13 countries, including Malaysia, participated in the event. It was truly amazing. There were some memorable performances, and some not so inspiring ones (particularly from France :P). However, performances from USA and Thailand seemed to be more pop-oriented, while the militaristic discipline of the Singapore team was shown in the way they planned their formations. All in all, this is an event that we would not have known of if not for the complementary passes from Datuk. So, thanks again Datuk!
The fireworks display was fantastical. I wonder how much money was spent just on fireworks!
Opening acts by our Malaysian army...
...and Unit Gerak Khas police.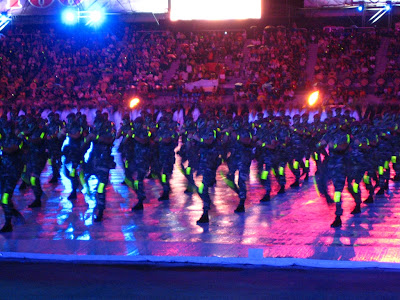
Team Brunei...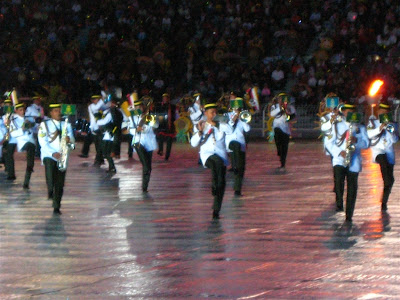
...Pakistan...
...France *yawnnn*...
The militaristic Singaporeans surprisingly drew loud applause and cheers.
The Americans sang and played My Girl, among other popular songs.
The Korean "drummer boys" were fantastic, with their swift playing and superb coordination.
Team New Zealand brought Maori tribal performers and did the Haka dance.
The enthusiastic band conductor from The Phillipines.
The charming and hot military girl from Thailand singing "Sabai Sabai"!
Wednesday, September 12, 2007
Tonle Sap - as wide as an ocean...
This picture was taken by jyon as our boat was riding out towards the center of the lake. We encountered choppy waves and slowly turned around for fear of capsizing. It was then that we saw these boats gracing the waters as if they felt nothing. Tonle Sap lake is truly such a large lake that from this angle, it looks more like an open ocean!
Saturday, September 08, 2007
Abundance
Are you craving for some century eggs? Just look at the slick and shiny surface of the eggs. Imagine their succulence as you bite into the flesh and taste the bittersweet wonder that explodes from within.
Tuesday, September 04, 2007
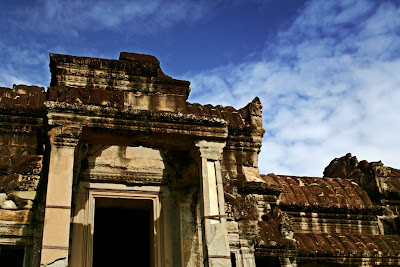
Entrance to Angkor Wat
This was taken inside the compound of the entrance area, just before ascending the staircase to enter Angkor Wat. These stones have withstood a thousand years of nature's beatings, and yet they still stand tall and proud.
Monday, August 27, 2007
Angkor Wat - entrance
This picture of Angkor Wat was taken by elsf as we walked past one of the 4 gates and entered the compound for the first time. It was a sunny morning, the radiance of the morning light bathed the temple with its glorious rays. It was truly a magnificent sight.
Friday, August 24, 2007
Stone Wall in Angkor Wat compound
As I mentioned, I made a trip to Siem Reap, Cambodia recently, and the main attraction was visiting the Angkor Wat ruins. This shot was taken after we descended from the steep staircase from the top of the main tower.
Angkor Wat is truly a magnificent place. If making a trip for photography, I really suggest getting at least the 3-day pass. Otherwise, if you're rushed like me, you won't be able to capture as many memorable shots as would be possible.
Take your time to admire the surroundings, the stone carvings, the sheer immenseness of this super structure built 1000 years ago. You will be amazed.
Wednesday, August 22, 2007
Trip - Cambodia - Siem Reap - Angkor Wat
I just came back from a 4 days holiday in Siem Reap, main purpose was to visit Angkor Wat and the surrounding temples, and also visit an orphanage and a shelter home for street kids. I treated this trip more as a photography trip, and came back with tons of pictures. Not only from my camera but also from elsf's and also jyon's cameras. Will post the pictures soon. But for now, let me just say that Angkor Wat is truly magnificent, and I am indeed thankful to live in a peaceful and "prosperous" country.
Wednesday, August 08, 2007
More test shots using 50mm
We had our weekly gathering in McDonald's SS15 Drive Thru.
Sorry people! If you don't want your face here, just give me a buzz.
All photos are JPEG's straight out of camera. I normally set my camera's parameters as follows: Contrast +2, Sharpness 0, Saturation +2, Color Tone 0.
Tuesday, August 07, 2007
Camera basics :: Aperture, Shutter Speed, ISO
Not everyone will need to know all these photographic terms. Point-n-shoot photographers will not bother because their cameras have scene presets or fully auto modes that give them adequate results. So who really wants to know this stuff?
Actually it's written for my own reference, just in case I do fumble with the terms in the near future. Here goes on my explanation of these photographic terms.
Aperture, Shutter Speed, and ISO can be considered as the building blocks of a camera's imaging system (be it the film or the digital sensor). Let's try to explain these terms with an analogy.
If we now imagine that there is a bucket which is filled with a fixed amount of sand, and a water tap that can be used to fill the bucket. Now, we can vary the opening of the water tap by controlling how much we turn the spigot. We can also control the duration of the water tap being open. Finally, we can also choose a smaller bucket to store the water (with the same amount of sand in it).
If we open the water tap larger, it will take less time to fill up the bucket. If we open the water tap smaller, it will take more time to fill up the bucket. If we choose a smaller bucket, it will also take less time to fill up the bucket but the water will be more murky. A combination of these 3 parameters will result in the same thing: a bucket full of water.
So what is what?
Opening size of the water tap is analogous to the Aperture, i.e. how big is the opening.
Duration of the water tap being open is analogous to the Shutter Speed, i.e. how long is the shutter kept open.
Bucket size is analogous to the ISO, i.e. how easy it is to fill the bucket (with the expense of getting murky water, or noisy pictures).
The bucket refers to the film or digital sensor.
And of course, water in this case is analogous to light, which is what the camera is trying to capture anyway.
OK, let's see what happens now.
Aperture is represented with F numbers. The larger the F number, the smaller the Aperture, and vice versa. Normally they are written as f/2, f/4, f/5.6, f/16, f/22, etc.
Shutter Speed is represented with numbers or fractions, with units in seconds. Typically it's written as 1/30, 1/250, 0.3, etc.
ISO is represented in whole numbers. The larger the ISO, the more sensitive the digital sensor or film (or the smaller the bucket size). Whole ISO units are 100, 200, 400, 800, etc.
So we can vary the combinations of these 3 parameters to get the perfect exposure: that's it, really. Of course, different apertures/shutter speeds will give different creative results (e.g. background blur, smoothened waterfalls).
Let's say the camera meters the following exposure: f/4.0, 1/200s, ISO200
Suppose that we want to make the background blur even more outstanding, so we need a larger aperture, say f/2.8. Remember our analogy: the water tap opening is now very big. This means we either need to increase the shutter speed (shorten the duration that the water tap is open) or reduce the ISO (get a larger bucket) to maintain the same exposure (the bucket is properly filled to the brim). So we can either do:
f/2.8, 1/400s, ISO200
or
f/2.8, 1/200s, ISO100
Then let's say we want to stop action (maybe in sports photography) and the shutter speed is too low. So we need to increase the shutter speed to say 1/800s (shorten the duration that the water tap is open). Thus we either need a larger aperture (larger water tap opening) or a higher ISO (smaller bucket), or a combination of both:
f/2.0, 1/800s, ISO200
or
f/4.0, 1/800s, ISO800
or
f/2.8, 1/800s, ISO400
Or maybe we want to have everything in focus from foreground to background (small aperture, e.g. f/8.0):
f/8.0, 1/50s, ISO200
or
f/8.0, 1/200s, ISO800
or
f/8.0, 1/100s, ISO400
With today's camera's through-the-lens metering and auto-program modes, the perfect exposure is calculated automatically. What we need to do is to be aware of the metering characteristics, creative exposure and adjust the compensation accordingly.
Anyway, all the above is fine for ambient light photography; but in Flash photography, choosing a higher ISO will give different results than choosing a lower shutter speed or larger aperture. But that's for another day.
P/S I hope I got all that right!
What is a 50mm good for?
Yesterday Alex asked me what is a 50mm lens good for?
Here are my feeble attempts to answer him:
1) 50mm x 1.6fov = 80mm ~ short telephoto ~ half body portraits
2) f/1.8 ~ large aperture ~ low light no flash photography
3) f/1.8 ~ large aperture ~ blur background
Any more justifications?
4) It's dirt cheap! Go get one now!
Sunday, August 05, 2007
Sunset @ Bali (Jimbaran Bay)
This photo was taken at Jimbaran Bay in Bali, Indonesia. We arrived for a seafood BBQ dinner quite late, so I only had around 10 minutes of golden hour before the colours finally faded to black. I did some cropping on this picture so that the silhouette is on one side instead of the middle. Probably not such an interesting shot if not for that silhouette of a passerby.
Friday, July 27, 2007
Saya telah membeli alat permainan yang baru...
Update 3
Yet another test shot. The focus point is between the "o" and the last "n" of the Canon word. This is a picture of the 18-55 kit lens. As you can imagine, the kit lens size is not that big, so the distance to the floor is only a few cm. Yet, the floor is completely out of focus already. Even the letterings of the "18-55mm" on the lens barrel is blurred. I love the 50mm cheapie! Note: picture is auto-levels adjusted.
Update 2:
This lens is superb. I took this picture of small figurines on my decorative shelf. The distance from the 2 cats to the picture frame in the background is only 10cm. The focus point was the nose of the right cat (I know, I know, it's not really in focus). Check out the blur! Only auto-levels adjusted in Photoshop.
Update 1:
Got it from J-One Amcorp Mall. Will post sample pictures soon. In the mean time...

Original:
Untuk maklumat lanjut, sila tunggu sebentar. Saya belum menangkap gambar dan menulis karangan lagi...
Wednesday, July 18, 2007
How to take night photographs with flash?
This post is written with the Canon user in mind.
Normally, if you want to snap a picture of someone at night, you will use the flash, set your camera to the green box or P mode and fire away. All is fine, till you review the picture. The background is so totally blacked out and only the subject is well-lit. What happened?
Well, in the Canon system, if you are using the green box or the P mode, the camera will assume that you are using ONLY the flash as the main light source, and will set the minimum shutter speed to 1/60s to avoid camera shake. Also depending on the camera, ISO will be set automatically (or not). Anyway, since the built-in flash of many cameras have very limited power, the amount of light generated from the flash is not enough to light up the entire room or background. It can only reach far enough to light up your main subject. That is why you get what you get.
The smarter way would be to switch to some manual modes. You can use either Av or Tv or M mode. In these modes, the camera will assume that you are using the ambient light as the main light source, and the flash as a fill-in light only. This means that the camera's light meter will set the aperture and shutter speed to expose for the room or background correctly. Typically, for night shots, I like to use Tv mode set to 1/25s or 1/30s, ISO800 or ISO1600, and fill-in flash. This achieves several things: firstly, the shutter speed is slower than 1/60s yet not too slow to induce camera shake; secondly, the ambient light is well registered in the camera by using high ISO; thirdly, by filling in with flash, I can fill in the shadows in my main subject and also catch some sparkle reflection in their eyes.
Alternatively, I also use Av mode sometimes, but I have to keep my eye on the shutter speed to ensure that no camera shake is induced. Typically I like to underexpose by -1/3 or -2/3 and correct the levels in post processing later.
If you have a separate flashgun (e.g. Speedlite 430EX), you can do some bounce moves and have better control over the direction and size of your light source. I am now learning how to use a bounce card to achieve better flash results. I point my flash gun to the ceiling, attach a curved piece of white paper to the back of the flashgun so that the reflected light is diffused forward, while the main flash strobe is bounced on the ceiling to create a soft effect. This can work 80% of the time, but of course the photographer must be mindful to ensure that the ceiling is not too low (overpowering flash) or too high (wasted flash power).
Anyway, those are the tips I can think of. Basically, don't use the green box and P mode because that will fix your shutter speed to 1/60s or faster, and that is just too fast for the camera to capture any ambient light from the room or background.
Tuesday, July 10, 2007
Searching for Truth 2
This photo was taken at Tanah Lot, Bali. It was late afternoon, and there were many tourists in this popular place of interest. I got down low and snapped this picture which shows the people walking as if with a noble aim, but in fact they are just walking towards the Tanah Lot temple.
I performed a lot of manipulation in Photoshop to get these pretty colours. This shows that we don't need to be faithful to the natural conditions in order to create artistic shots.


